How Countertop Installation Lakewood Crews Handle Install Day
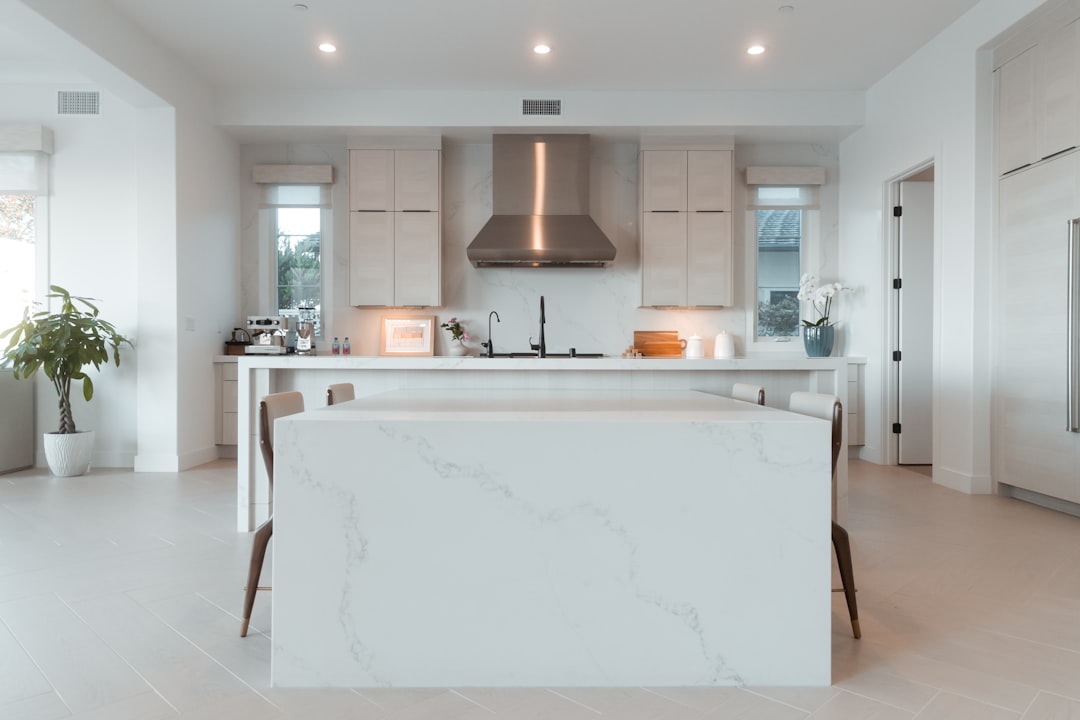
Most kitchens in this city sit inside homes that went up in a three year stretch at the start of the 1950s, when the tract north and south of Del Amo Boulevard was built about as fast as houses have ever been built in California. The layouts were efficient and tight, and nearly every one of those kitchens has had its counters swapped at least once since. That history shapes the work. The sequence behind countertop installation lakewood homeowners go through is not one appointment, it is four or five separate steps spread across roughly two weeks, and understanding the order takes most of the anxiety out of it.
Here is what actually happens between the first phone call and the last bead of caulk.
The First Visit Is a Measurement, Not a Sale
The opening appointment should be quiet and boring. Someone walks the kitchen with a tape, checks the run lengths, notes where the range and sink sit, opens the cabinet doors, and looks underneath. That underside check matters more than most homeowners expect, because it decides whether the existing boxes can carry stone at all.
Two things get flagged on this visit. The first is square footage, which drives the number on the estimate. The second is condition: whether the cabinets are level, whether the sink base has water damage, whether a previous laminate job hid a rotted corner. An estimate written without opening a single cabinet door is a guess, and guesses turn into change orders on install day.
Expect the visit to take thirty to forty five minutes for a standard kitchen. You should walk away with a written number that separates material, fabrication, edge work, cutouts, tear out, and disposal into their own lines. A single lump sum makes it impossible to compare two bids.
Picking the Actual Slab, Not the Sample
A four inch sample chip tells you the color family and almost nothing else. Natural stone moves across a slab: veining wanders, background tone shifts, and the piece that ends up on your island may look meaningfully different from the chip you held in a showroom.
Southern California is a good place to be for this. The slab yards clustered around the ports and the industrial corridors between here and downtown carry deep inventory, and most of them will let a customer walk the racks with their fabricator. If you are buying granite, marble, or a heavily veined quartzite, go look. Stand back fifteen feet, because that is how you will see the counter every day, not from six inches away.
For engineered quartz the stakes are lower, since the pattern repeats by design, but even then it is worth confirming the lot number. Quartz lots vary slightly, and a kitchen that needs three slabs wants all three from the same run.
Once a slab is selected it gets tagged and held. Ask how long the hold lasts. A week is common, and a hold that expires quietly is one of the more annoying ways a project slips.
Templating Day
Templating is the step that decides whether the finished counters fit. A crew arrives, and for most shops now that means a digital templating rig: a laser or a photogrammetry setup that captures the room to a fraction of a millimeter and produces a file the saw can read. The plywood and hot glue method still exists and still works, but the digital version is faster and far less forgiving of a sloppy measurement, which is a good thing.
For templating to be accurate, the old counters usually need to be gone, or at least the new sink and faucet need to be on site. Bring the actual sink to the appointment. A cutout sized from a spec sheet rather than the physical basin is a known way to end up with a reveal that looks wrong around an undermount.
This is also when you sign off on decisions that become permanent: edge profile, backsplash height, overhang depth, where the seams will fall, and how the stone meets the range. Take the extra ten minutes here. Every one of those choices is cheap to change on the template and expensive to change after the saw runs.
What Happens at the Shop
Fabrication takes most of the calendar time. The file goes to a CNC saw or a waterjet, the slab is cut, the sink and cooktop openings are dropped, and then the edges are profiled and polished. A simple eased or bullnose edge is quick. A mitered waterfall or a thick built up edge adds days, because it means laminating two pieces of stone and polishing the joint until it disappears.
Ten to fourteen days from template to install is a fair expectation for a standard kitchen. Shorter is possible when a shop has capacity. Much shorter usually means corners are being cut somewhere, most often in polishing time.
Install Day in a Tract Kitchen
This is the part people picture, and in a well prepped kitchen it takes four to six hours.
Access and the Galley Problem
The original kitchens in this area are narrow, and the path from the driveway to the counter often runs through a doorway that was sized for 1952. A full slab is heavy and it does not bend. Before install day, someone should have confirmed that the pieces fit through the door, around the corner, and past the refrigerator. On a few floor plans the answer is that a section has to be seamed differently than it would be in a wider house, which is a fabrication decision, not something to discover with three people holding stone in a hallway.
Clear the path yourself the night before. Pull everything out of the base cabinets, move the table, and take down anything hanging in the way. Crews will work around clutter, but the job goes faster and safer without it.
Leveling the Cabinets
Stone does not flex to match a cabinet run, so the cabinets get shimmed until the run is level before anything is set. In a seventy year old house this step is rarely skipped, because settling is real and the floors are not flat. A counter set on an unlevel run will show a visible gap at the wall, and worse, it puts uneven load across the slab.
If the sink base is soft from an old leak, this is the moment it gets rebuilt or replaced. That is a good reason to have the estimate include a contingency line rather than pretend the problem cannot exist.
Seams and Where They Land
Every kitchen longer than a single slab has at least one seam. The craft is in placing it well. Good practice puts a seam over a cabinet partition for support, keeps it out of the middle of an island where the eye lands first, and avoids running it through a sink cutout where the stone is already weakened.
A modern seam set with a color matched epoxy and pulled tight with a vacuum seam setter should be something you can feel only if you go looking for it. Ask to see where the seams will fall on the layout drawing before fabrication starts. It is a normal request and any shop worth hiring will show you.
Sink, Faucet, and the Plumbing Gap
Undermount sinks are attached to the underside of the stone with clips and adhesive, and that bond needs time to set. Most installers will mount the sink on install day and then ask you to leave the plumbing disconnected overnight so nothing is stressed while the adhesive cures.
Plan for the kitchen to be out of service for about twenty four hours around the install. If a plumber is doing the reconnect rather than the counter crew, book that visit for the following morning, not for the same afternoon.
Overhangs and Support
An overhang up to about ten inches on quartz or granite generally carries itself over a standard cabinet run. Past that, the stone needs steel: flat bar brackets set into the cabinet top or a hidden plate that spans the seating area. Wooden corbels look decorative but often are not doing structural work.
This matters on the peninsula and island seating that gets added when one of these older kitchens is opened up to the living room. Ask specifically what supports the overhang, and expect a specific answer.
A Realistic Two Week Schedule
| Step | Timing | What you need to do |
|---|---|---|
| In home measure and estimate | Day 1 | Empty a couple of cabinets so the boxes can be checked |
| Slab selection at the yard | Days 2 to 4 | Go in person for natural stone, confirm the hold period |
| Template | Day 5 | Have the sink and faucet on site, decisions made |
| Fabrication | Days 6 to 13 | Nothing, this is shop time |
| Tear out and install | Day 14 | Clear the path, empty base cabinets, plan to eat out |
| Plumbing reconnect | Day 15 | Confirm who is doing it and when |
Add time if the cabinets need work, if a slab has to come from out of the area, or if the edge profile is a mitered build up.
The First Week After Install
Caulk and epoxy need to cure. Keep water off the seams and out of the sink perimeter for the first day, skip harsh cleaners for the first week, and do not set anything heavy on an unsupported overhang while the adhesive is still green.
Sealing depends on material. Engineered quartz does not need it. Granite usually wants a sealer at install and then a refresh every year or two depending on use. Marble is more porous still and etches from anything acidic, which is worth knowing before you fall in love with it. A good installer will tell you which category your stone falls into and hand you the specific product rather than a generic bottle.
Questions Worth Asking Before You Sign
Five questions separate a solid bid from a thin one:
- Where will the seams fall, and can I see that on the drawing?
- Is tear out and disposal of the old counter included?
- What happens if the cabinets turn out to be unlevel or the sink base is damaged?
- Who reconnects the plumbing, and on what day?
- What is the warranty on the fabrication and the installation, separate from the material warranty?
Vague answers on any of these tend to become the exact thing that goes wrong.
Getting Started
The honest first step is a measure, because square footage and cabinet condition are what turn a rough price range into a real number. For a free in home estimate, contact us or call (562) 301-3505 and we will walk the kitchen with you.
Need help in Lakewood?
Call (562) 301-3505